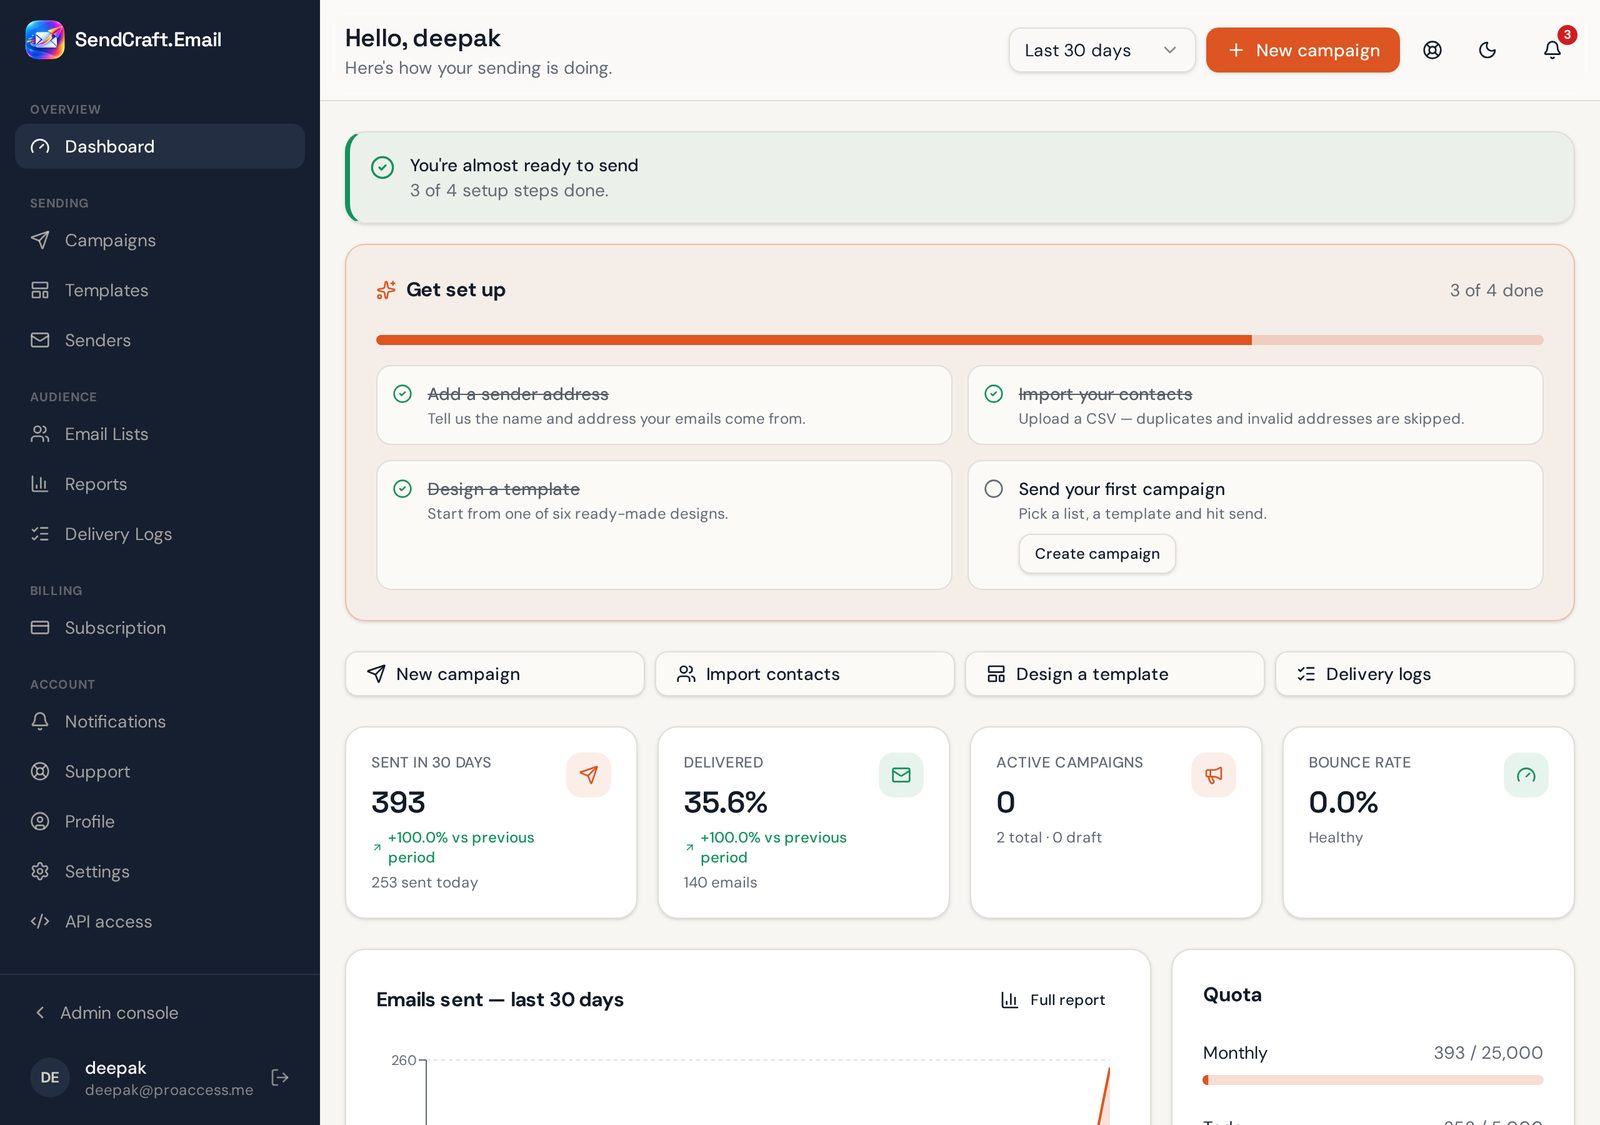
Sign up with your email and password (or Google). The dashboard is your home screen: a short setup checklist, how many emails you have sent, and how much of your monthly allowance is left.
The green checklist at the top shows what is still missing before your first send.
The cards show emails sent, delivered, active campaigns and bounce rate for the last 30 days.
The bell in the top-right collects every alert: campaign finished, plan approved, support replies.
Start free → Dashboard — promote.email dashboard with the setup checklist and sending statistics
Step 2 · Senders
Add the name your emails come from
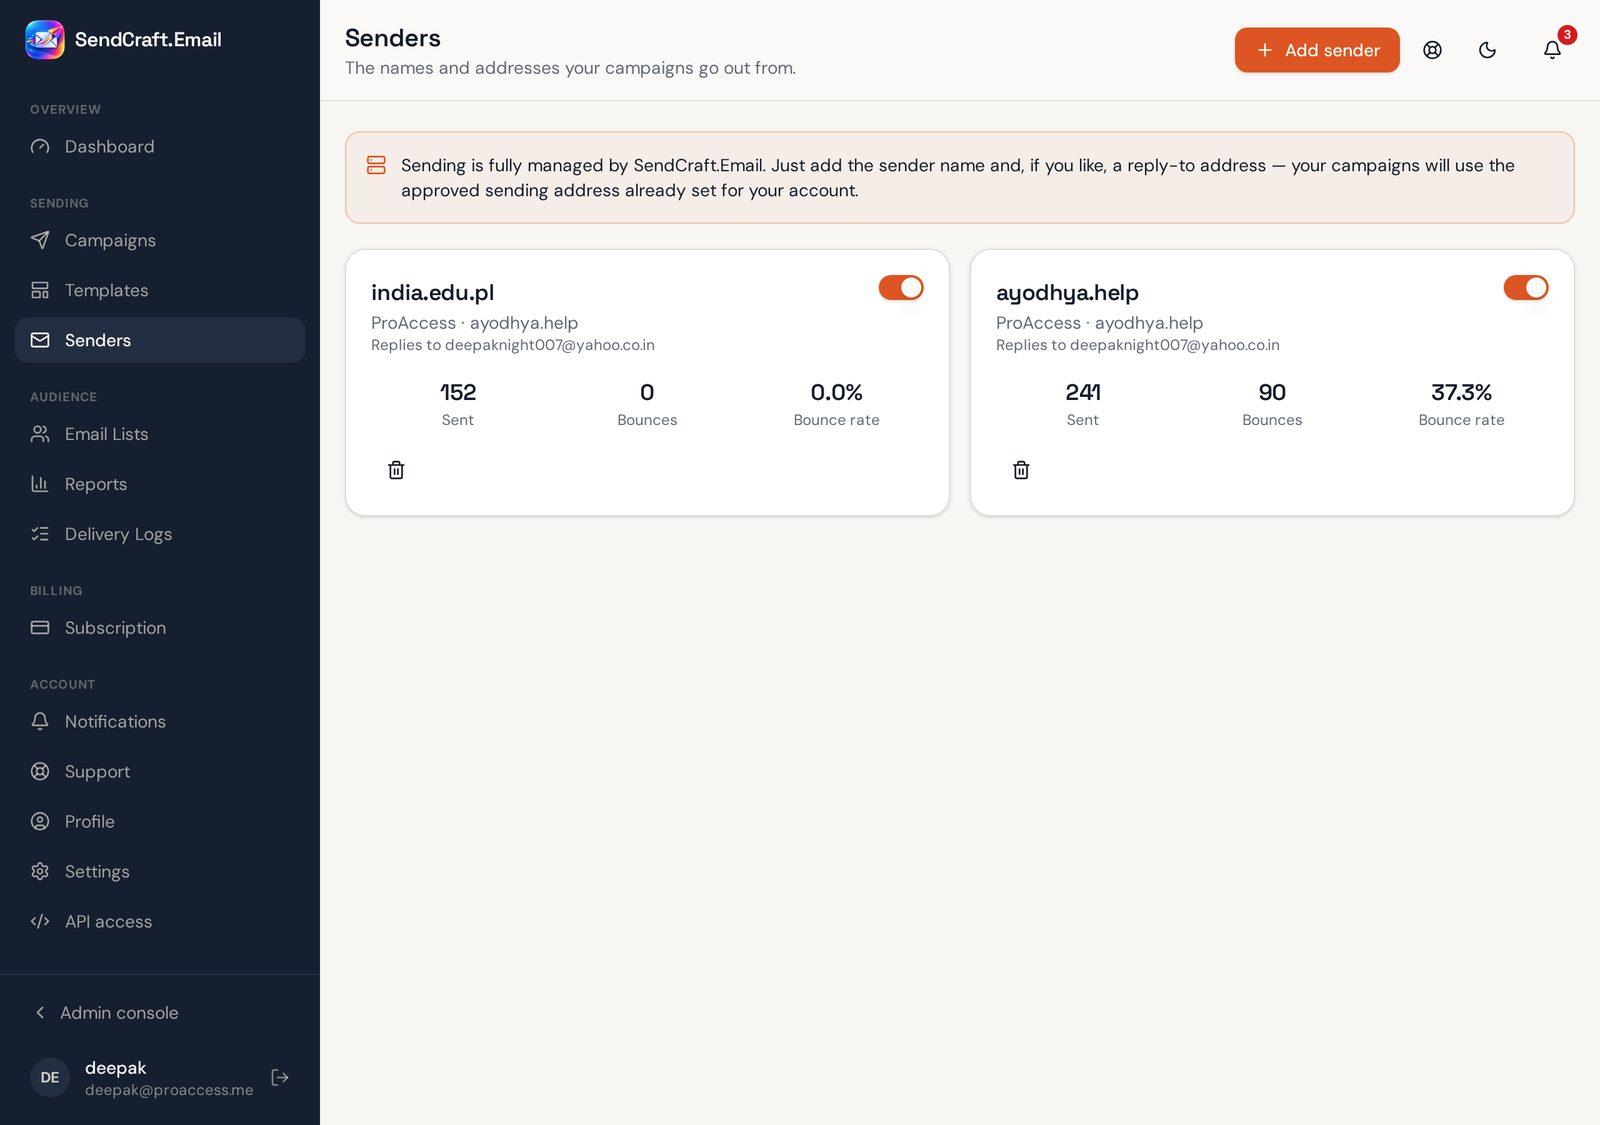
You do not set up any mail server. We run the sending servers for you — you only choose the from name, pick an approved sending domain and, if you like, a reply-to address.
Pick a domain from the approved list; each one shows its current health.
Add a reply-to address if replies should land in a different mailbox.
You can keep several senders, for example one per brand.
Senders — Senders page where you add the from name and choose an approved sending domain
Step 3 · Email Lists
Build your contact list
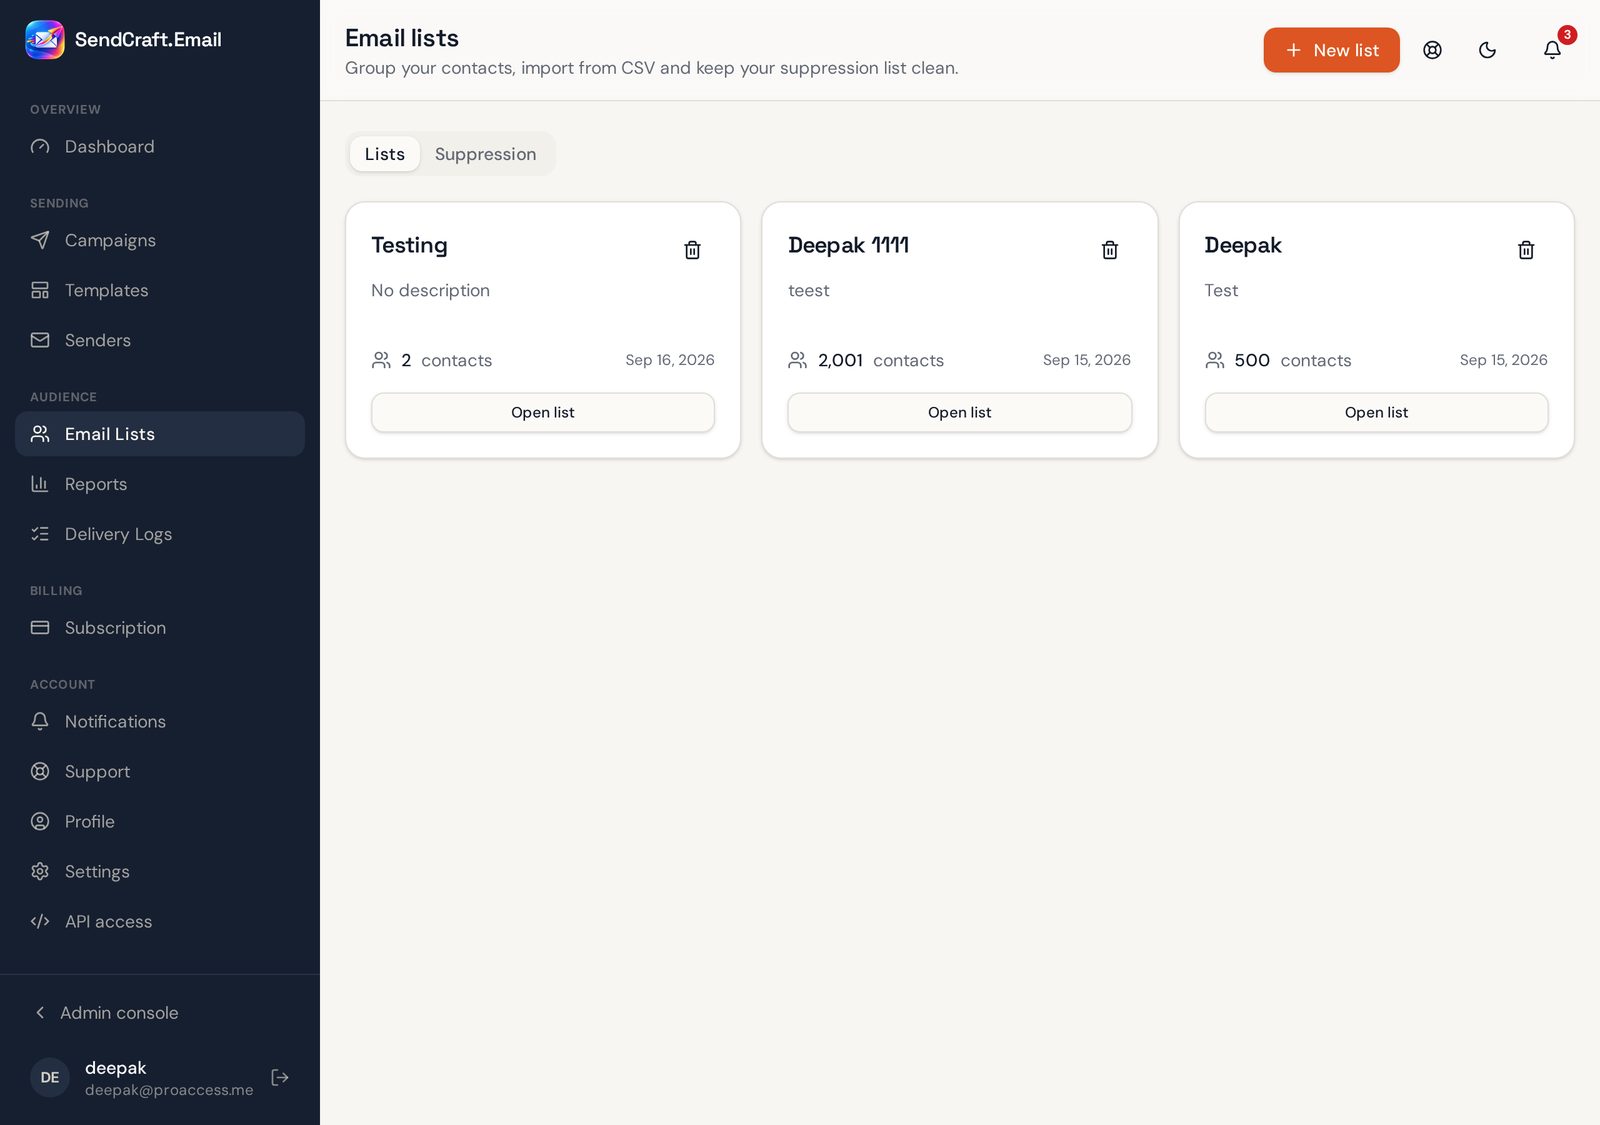
Create a list and add people one at a time, or upload a CSV file. Duplicates, invalid addresses and anyone who unsubscribed are skipped automatically.
CSV columns: email, first name, last name — the first row can be the header.
Uploads stop at your plan's contact limit, so you always know where you stand.
Unsubscribed and bounced addresses are kept out of every future send.
Email Lists — Email Lists page showing contact lists and the import button
Step 4 · Templates
Design the email
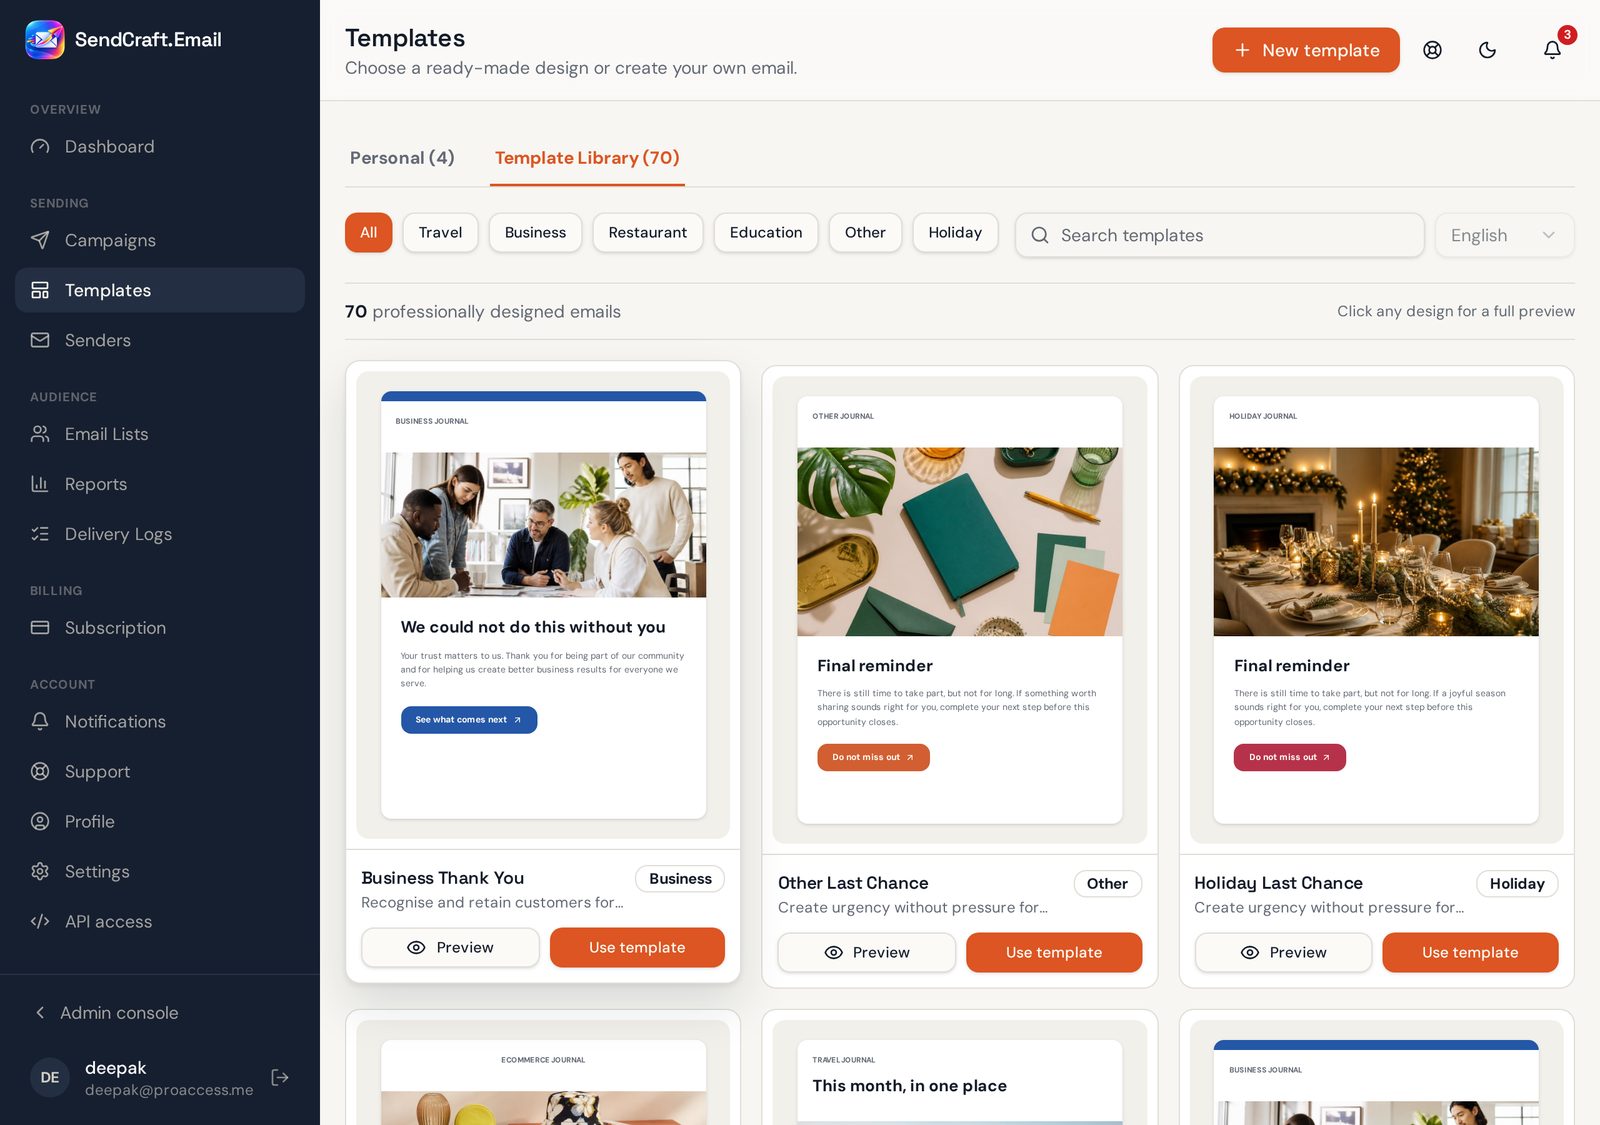
Start from the template library — 70 ready designs across seven categories — or build your own. The editor works in blocks: text, image, button, divider. Click a block, change it on the right.
Copy a library template to your Personal templates, then edit it freely.
Insert personalisation tags like {{first_name}} so every email feels written for one person.
"Check content" warns about words that get emails filed as spam before you send.
Rename a template any time by clicking its name in the editor header.
Templates — Template library with ready-made email designs grouped by category
Step 5 · Campaigns → New campaign
Create the campaign
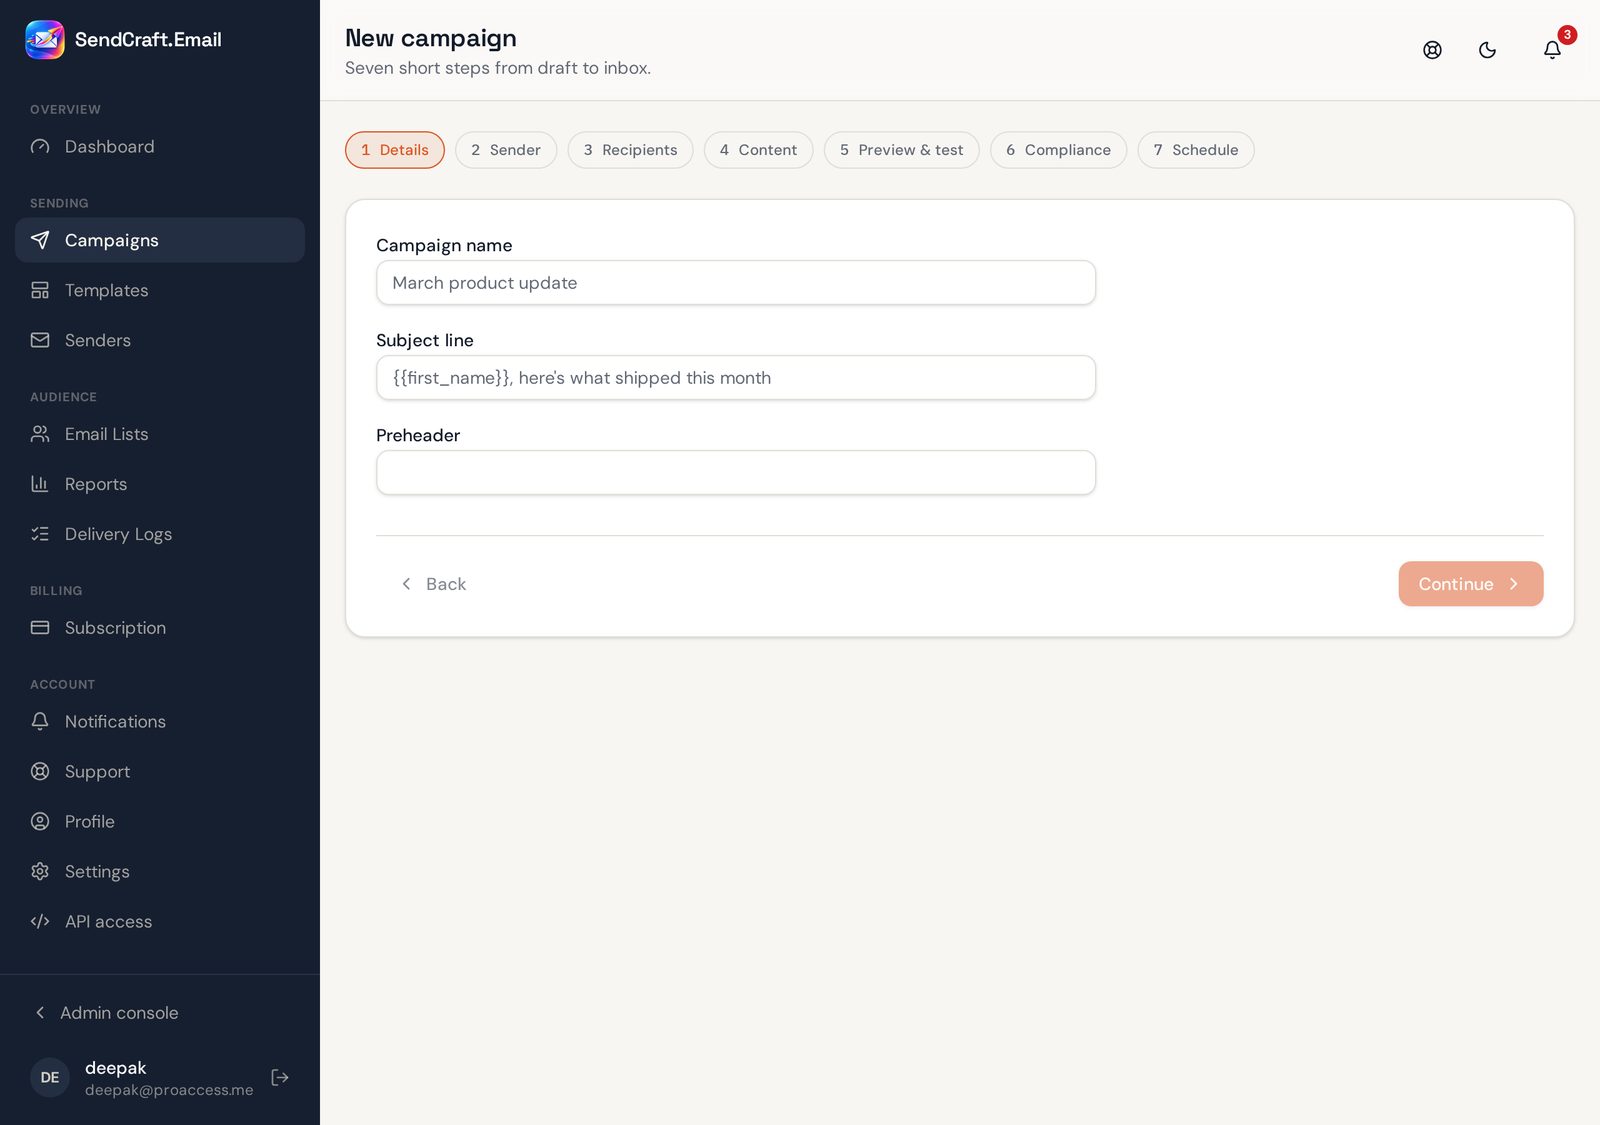
Seven short steps: details, sender, recipients, content, preview and test, compliance, schedule. You can leave and come back — it stays a draft until you send.
Send a test email to yourself first and read it on your phone.
Choose how many emails to send now — the page shows your remaining allowance.
Send immediately or pick a date and time.
Campaigns → New campaign — New campaign wizard on the details step
Step 6 · Campaigns
Watch it send safely
Sending is spread across several servers in strict rotation and paced to per-minute, hourly and daily limits, so your mail keeps a good reputation instead of being flagged.
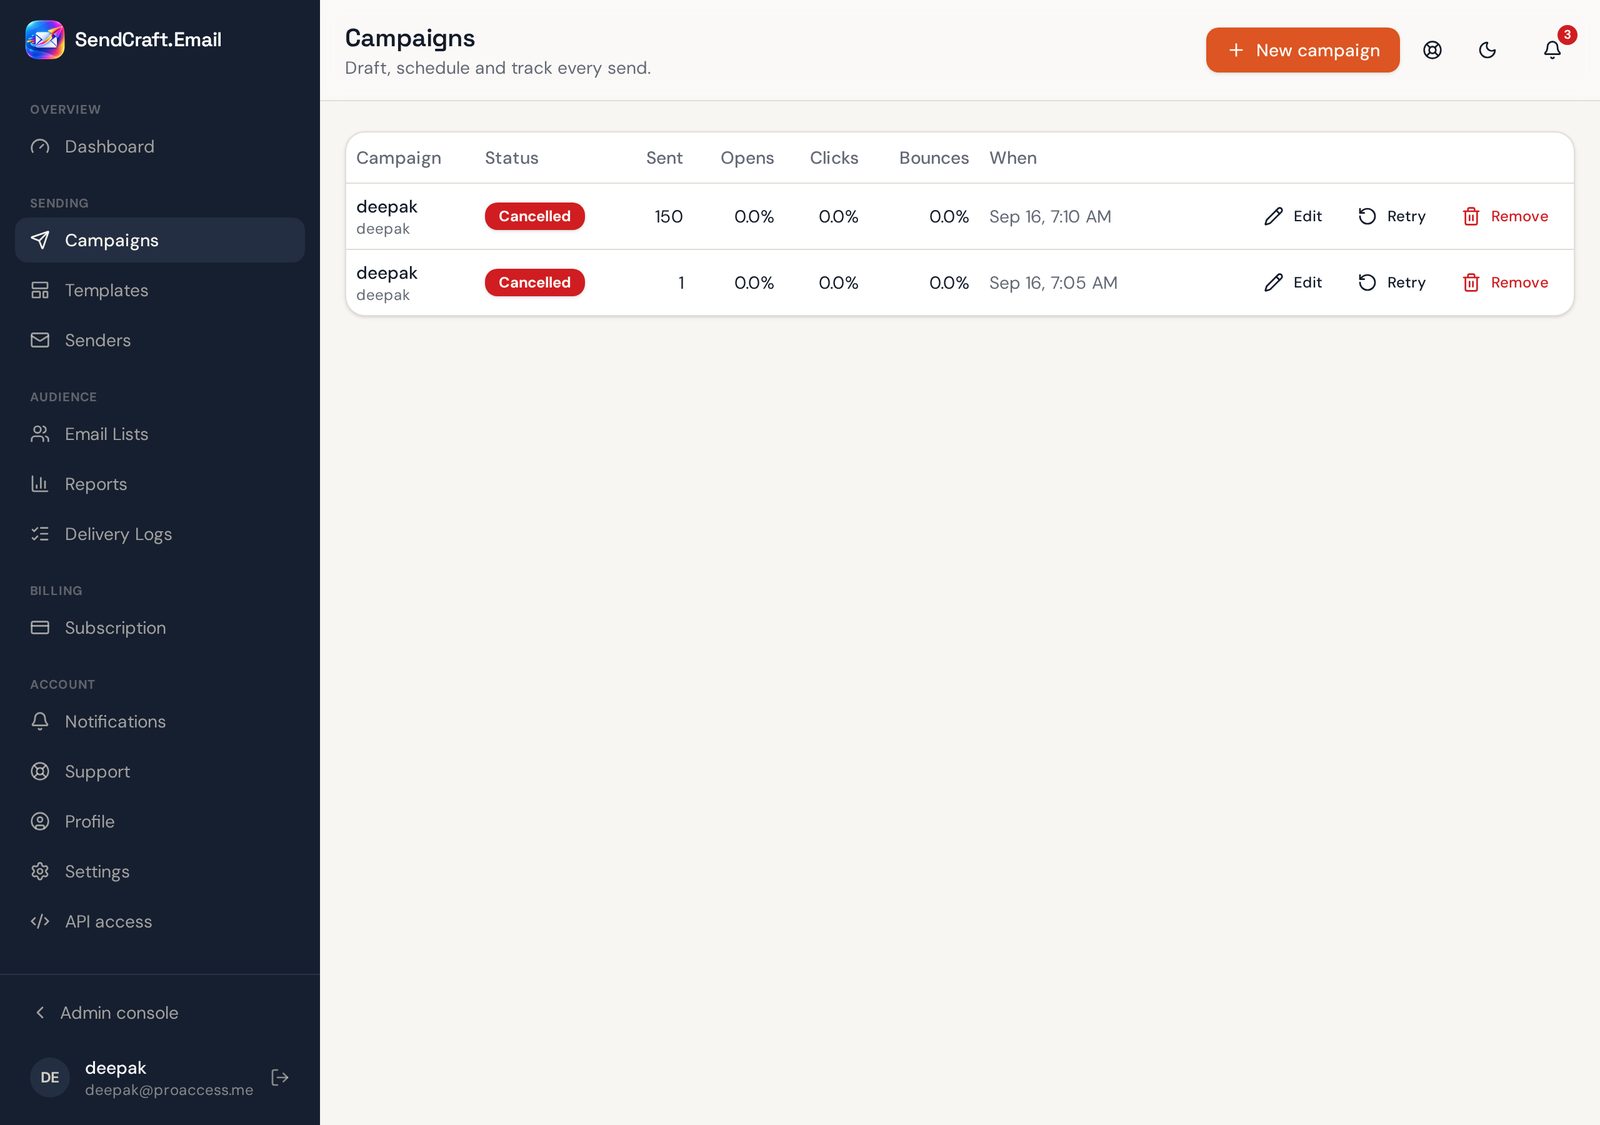
The progress card shows how many are sent, the current speed and the estimated finish time.
Pause, resume, stop or retry a campaign at any moment.
Restarting a campaign never emails the same person twice.
Campaigns — Campaign list showing sending progress, speed and estimated finish
Step 7 · Reports
Read the results
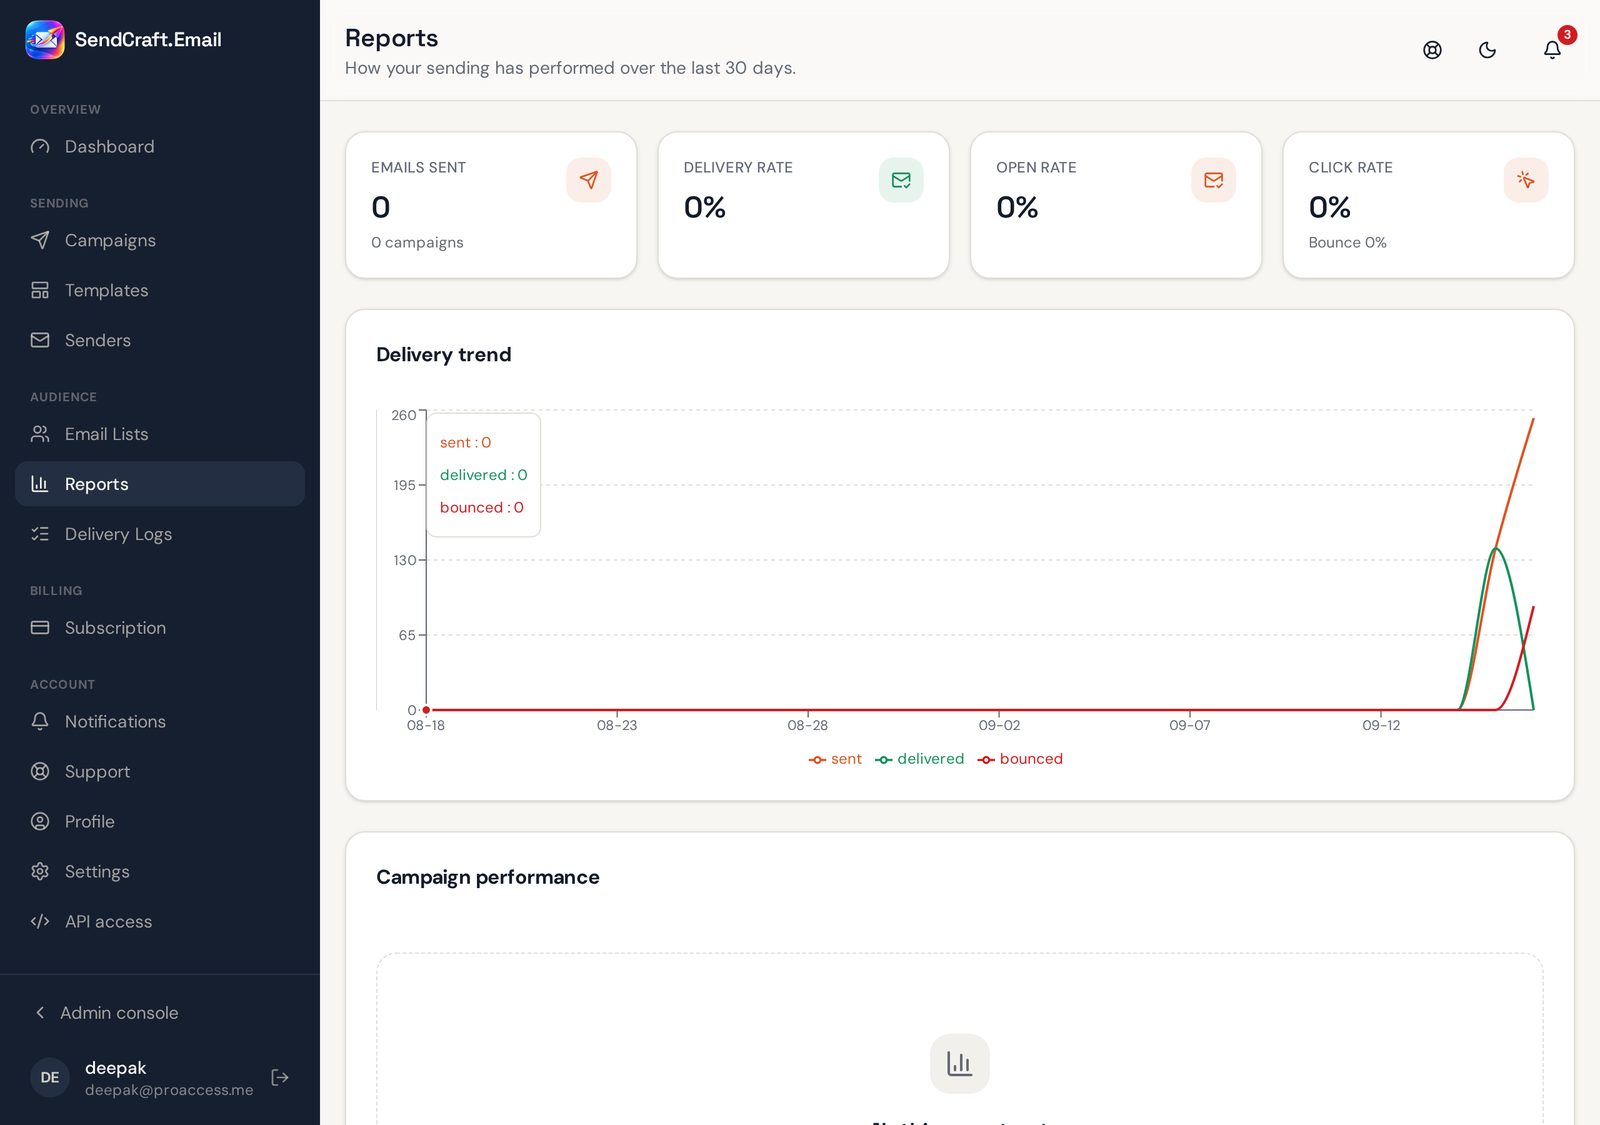
Reports show what actually happened: how many were accepted, delivered, opened, clicked or bounced. Nothing is estimated — only outcomes the mail provider confirms are counted.
Compare campaigns over any date range.
Export the numbers to CSV for a spreadsheet or a client report.
Reports — Reports page with delivery and engagement charts
Step 8 · Delivery Logs
Check any single email
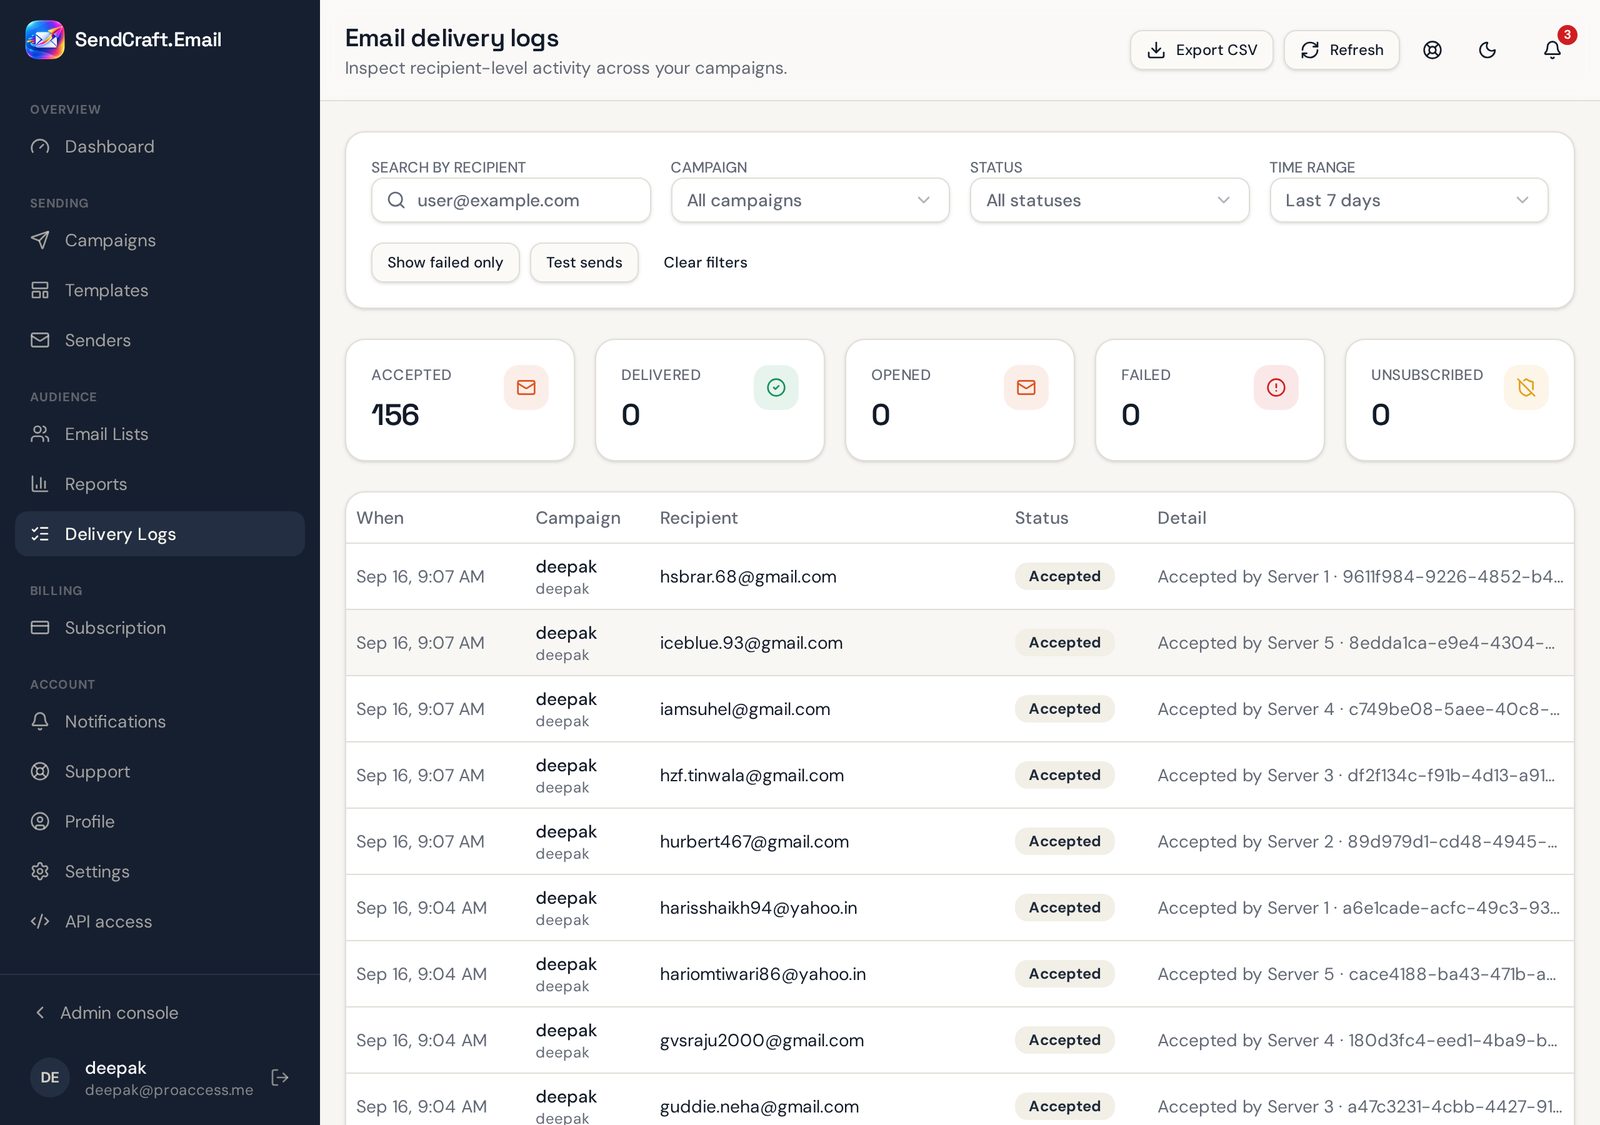
Every send has its own line: the address, the campaign, the result and the reason if it failed. This is the page to open when someone says they never received your email.
Filter by campaign, result or address; your filters are remembered.
Download the log as CSV.
The page refreshes on its own while a campaign is running.
Delivery Logs — Delivery logs listing every sent email with its result
Step 9 · Subscription
Choose a plan and keep your invoices
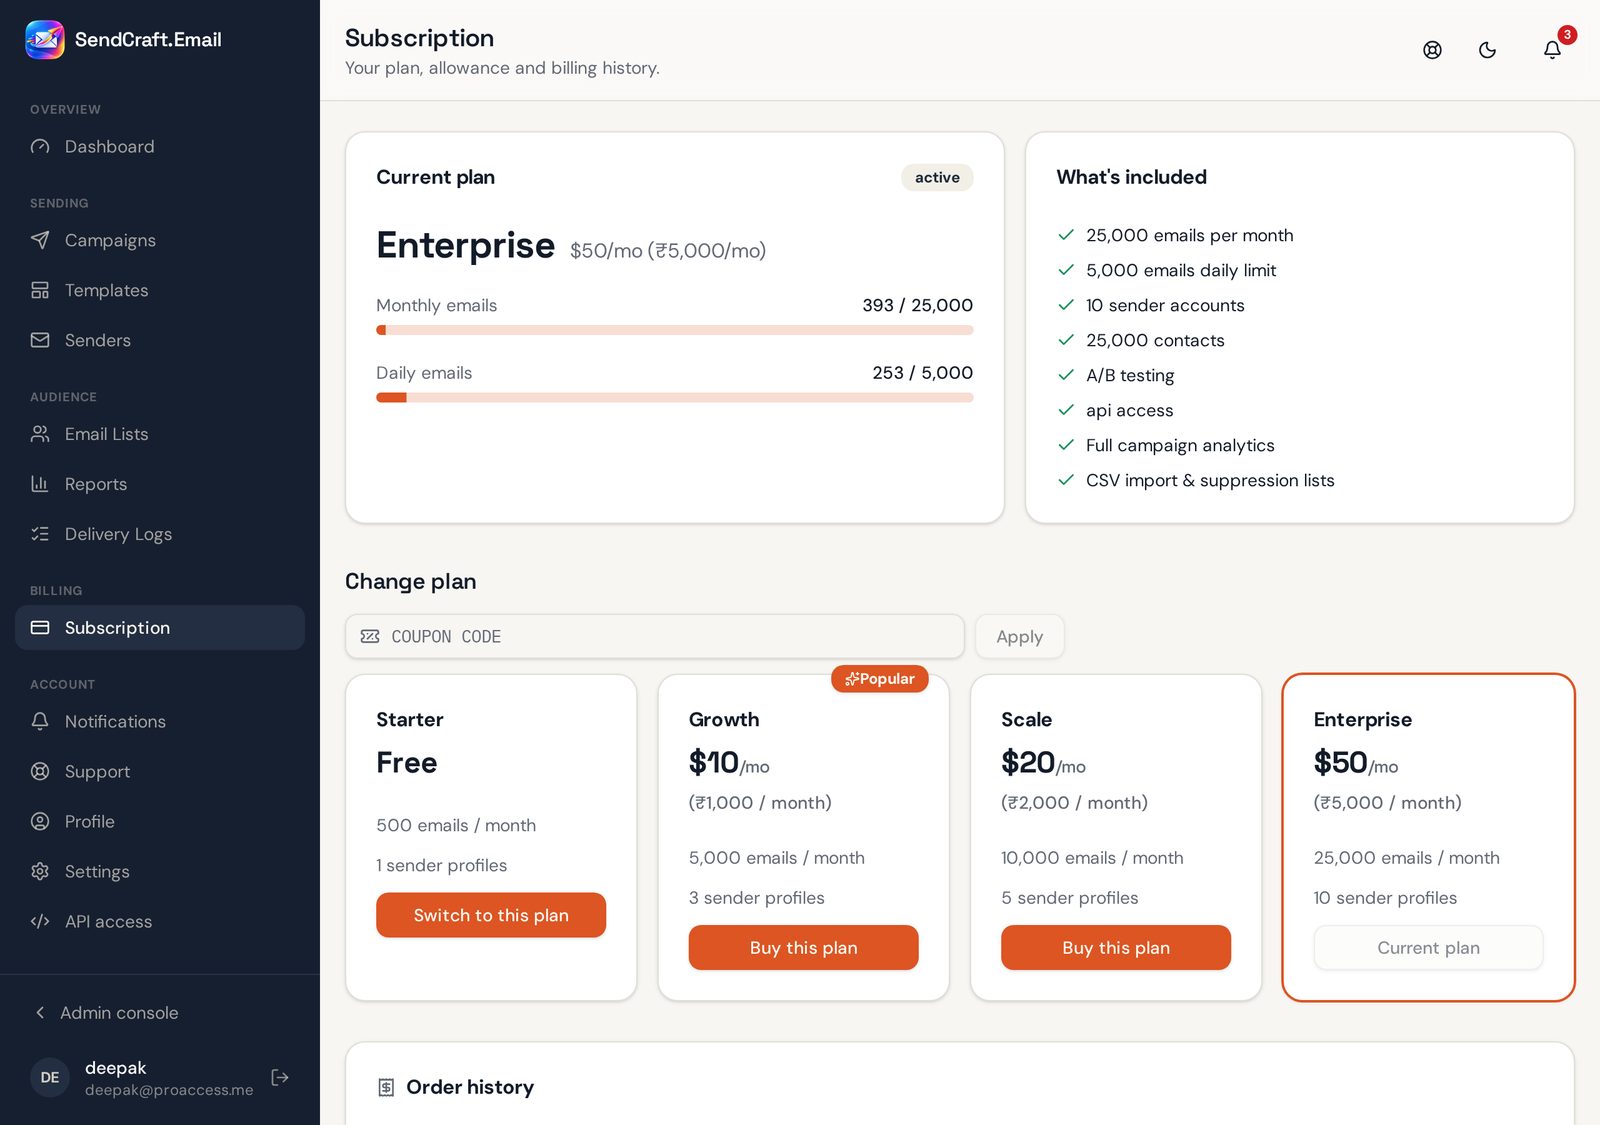
Pick a plan in USD or INR, apply a coupon if you have one, pay by UPI, bank transfer or one of the supported gateways, and upload the payment proof. Your invoices stay in your account.
Every order is listed with its status, so you always know what was approved.
Click an invoice to open it and download it as PDF or JPG.
Higher plans unlock extras such as API access and single sign-on.
Subscription — Subscription page showing the current plan, usage and invoices
Common questions
Do I need my own mail server or SMTP details?
No. Sending servers are set up and maintained for you. You only choose the from name and an approved sending domain.
How fast will my emails go out?
As fast as is safe. Emails are spread across several servers and paced to per-minute, hourly and daily limits; the campaign page shows the live speed and estimated finish.
What happens when someone unsubscribes?
Every email carries an unsubscribe link. One click stops all future mail to that address, on every list you own.
Can I try it before paying?
Yes. Create a free account, import a small list and send a real campaign first.